Many times, I get a common question in regard to nopCommerce: “How to add a custom page in nopCommerce?”. As nopCommerce switched from webforms to MVC, this question became more common on nopCommerce forums and I received a lot of requests from several nopCommerce users asking help.
Many ASP.NET developers are still new to MVC, as it can be a learning curve for any .NET developer, so I completely understand that it can be overwhelming to work with something that is totally different from webforms.
So, here I am writing an article on this topic to answer this common question and I hope it helps nopCommerce users who are looking for a solution to this problem / question.
I would like to point out one important thing here that if you are adding / creating a new page in your project / solution, if you plan to upgrade your nopCommerce version, you will have to add the custom page once again in your solution. Another good approach to keeping yourself away from this extra work of adding custom page again and again in every new version is to create a plugin and add your new page in form of a plugin to that you can simply install the plugin in your solution – Hence, you won’t have to write the custom code for your custom page again and again. But, since we are focusing on adding a new page in nopCommerce in this particular article, I will focus on that process / steps specifically.
Please follow the following steps:
Step 1) You will need nopCommerce source code version in order to add custom page in your problem. The source code for nopCommerce 3.1 version can be downloaded here: https://github.com/nopSolutions/nopCommerce
Step 2) Please open the nopCommerce solution in Visual Studio 2012

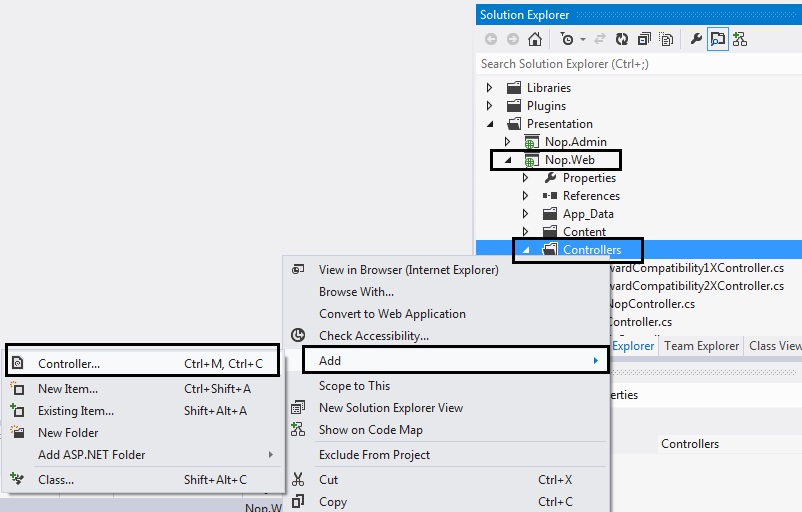
Step 3) Now, right click the “Controllers” folder > Select “Add” > Select “Controller..”
Step 4) Name the controller: I am naming it by changing the controller name from “Default1Controller” to “MyNewPageController”
In the Scaffolding options, make sure you have selected “Empty controller”

Step 5) Click “Add” and you will see the result in solution explorer as a new controller page called (in my case: “MyNewPageController.cs”)
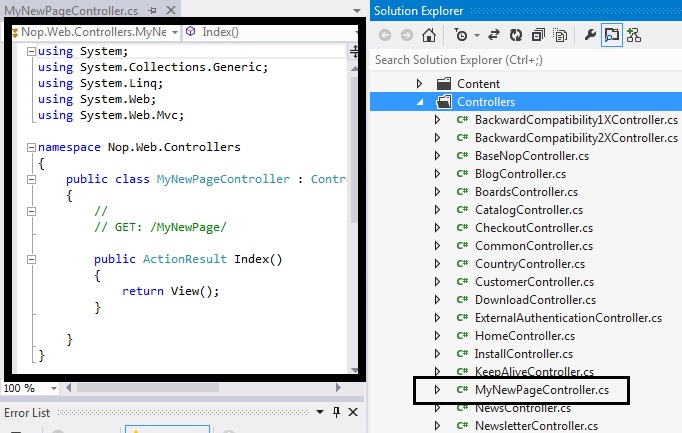
Step 6) In the left side (code): Right click on the Public ActionResult Index( ) line and select “Add View…”

Step 7) Leave the view name as “Index”
The view engine should be Razor (CSHTML)
The only box on this window that should be checked will be “Use a layout or master page:”
(Select the layout / masterpage by clicking the […] button: I am selecting “_ColumnsTwo.cshtml” in this case)
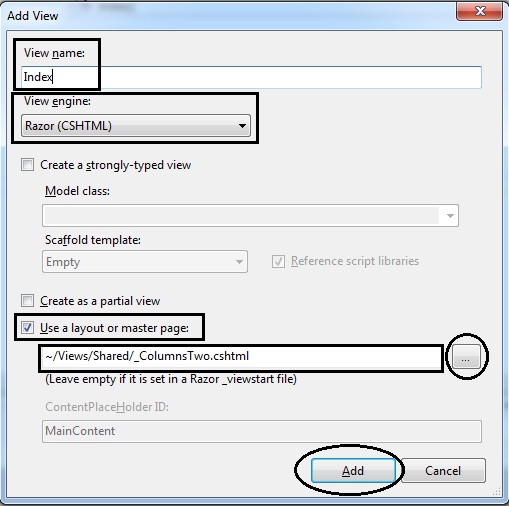
CLICK ADD BUTTON
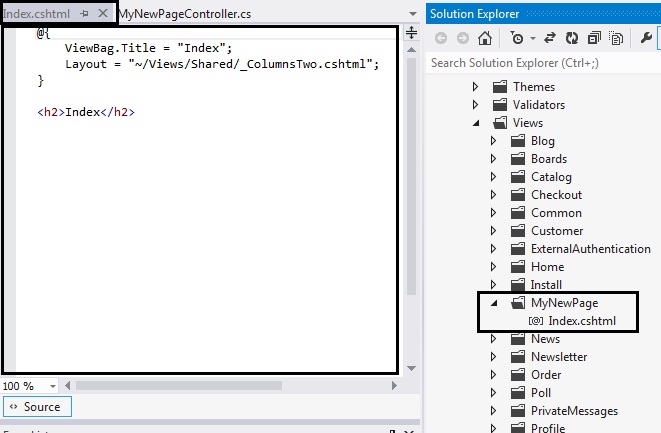
Step 8) Now, you will get a “Index.cshtml” page
(In the solution explorer, the location of this page will be in “Views” folder like this: Views > MyNewPage > Index.cshtml)
Step 9) In your solution, open RouteProvider.cs – You will find this file in this location: Nop.Web/Infrastructure/RouteProvider.cs
Step 10) Now, it is time to map the route so that solution can locate the new page. You will see different mapped routes like home page, install , products etc. Similar to that you need to map the route of your new page by adding the code like this:
//My New Page Test
            routes.MapLocalizedRoute("ThisIsMyNewPage", "MyNewPage",
                            new { controller = "MyNewPage", action = "Index" },
                            new[] { "Nop.Web.Controllers" });
In new { controller = “MyNewPage”, action = “Index” }, = “MyNewPage” is the name of your controller
In routes.MapLocalizedRoute(“ThisIsMyNewPage”, “MyNewPage”, = “MyNewPage” is the name of your View folder
Step 11) Now, recompile your solution and press F5
The url in the browser(address bar) might be something like this – http://localhost:15536/Views/MyNewPage/Index.cshtml
So, you might get error something like “Page not found” or “you typed the URL directly”. No need to panic !
Change the url to say this – http://localhost:15536/YourPageName
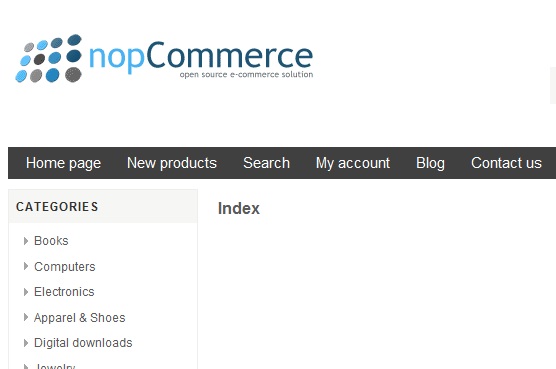
(In my case, I will change the url to: http://localhost:15536/MyNewPage)
Now, you should see a page with the layout that you chose and in the content it should say “Index”
Now you can add your custom content/code in this page or you can create a topic and add topic section in the page so that you can maintain from the administration side easily.